For my Major Digital Project I decided to teach myself how to do calligraphy. Calligraphy is decorative handwriting or handwritten lettering.

I love, love, LOVE watching calligraphy videos, I think that they are so calming because everything is so smooth and neat. Watching this progress of the words transform is so amazing and I want to be able to produce something just as crisp and clean as the videos that I see.
I chose to do calligraphy because I think that it is very pretty and elegant. It is a skill that not very many people can do, is inexpensive, and something that I can learn to do in the comfort of my own home. This week I just started learning the basics of calligraphy then I tried to create my own based on the blog that I used called Faux Calligraphy Tutorial: Step by Step.
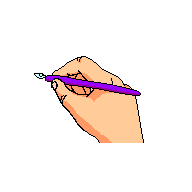
Before I began, gathered all my needed supplie: pens and paper. The paper that I chose to use for this blog were a journal I got for Christmas last year and over the weekend I bought a set of colorful manuscript pens from Michael's (Creative Lettering Colour Relax Dualtip by Manuscript)

But for this time I just used a simple ballpoint pen I got from TJ Maxx
The main points that I learned are:

I love, love, LOVE watching calligraphy videos, I think that they are so calming because everything is so smooth and neat. Watching this progress of the words transform is so amazing and I want to be able to produce something just as crisp and clean as the videos that I see.
I chose to do calligraphy because I think that it is very pretty and elegant. It is a skill that not very many people can do, is inexpensive, and something that I can learn to do in the comfort of my own home. This week I just started learning the basics of calligraphy then I tried to create my own based on the blog that I used called Faux Calligraphy Tutorial: Step by Step.
Before I began, gathered all my needed supplie: pens and paper. The paper that I chose to use for this blog were a journal I got for Christmas last year and over the weekend I bought a set of colorful manuscript pens from Michael's (Creative Lettering Colour Relax Dualtip by Manuscript)

But for this time I just used a simple ballpoint pen I got from TJ Maxx
 |
| Yes, my pen says 'Slay Always' :) |
The main points that I learned are:
- The trick to making the letter have the calligraphy look is to make your down strokes more thick. (A down stroke is anytime your hand moves down when you create a letter.)
- Exxagggeraaation (Exaggeration) of your letters are key. It is okay to experiment with your letters
- Use your resources; don't be afraid to reference from other artists (Instagram, Twitter, Facebook)
- Use a thicker pen, until you get good. When you use a thinner a pen you are able to see the uneven lines better (you don't want that). I used a thin pen and you will notice that you can see some of my flaws.
- And with anything else you do in life; practice, practice, practice. Practice transitions, letters, spacing, ect.
After following the simple steps from the previous blog above here is what I was able to create.

Even though this is my first day working with this project, I think that it is going to be fun to learn.It is very simple. I took her tips about practicing letters to make make them to your satisfaction
For my first day I an happy with how it turned out and know that there is only uphill from here.
 |
| and I realized that I need to brush up on my cursive! |
In my next blog, I will do some research and find a calligraphy artist that I like and show my practicing of cursive letters. Since I am a visual learner I will also try to find a video to help guide me. My goal for the end of this project is make something that I would be able to give as a gift (mug, canvas, glass).
A good start - this will be a very rewarding project and this skill will stay with you for many years.
ReplyDelete